DIY Murphy Table
How I Built My DIY Murphy Table for Our Home
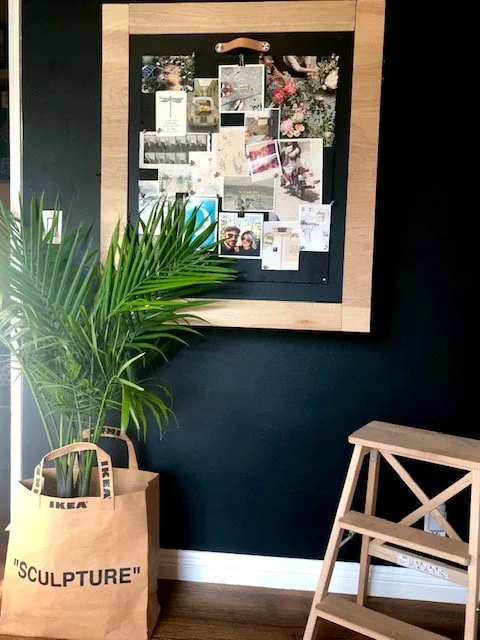
If you’ve ever wished your dining or work table could disappear when you’re done using it, this project is for you! In my latest video, I show you how I built a DIY Murphy Table — a fold-down table that tucks neatly into a cabinet when it’s not in use. It’s sleek, functional, and perfect for small spaces or multipurpose rooms.
Why I Decided to Build It
Our home isn’t huge, so I wanted a table that was there when we needed it and gone when we didn’t. I also wanted to create something that felt custom and beautiful — a piece of furniture that looked intentional, not just functional.
Step-by-Step: How I Built My DIY Murphy Table
1. Planning & Measuring
I started by measuring the wall space where the table would go. Getting the dimensions right is essential so the table folds away perfectly and fits your space.
2. Building the Cabinet Frame
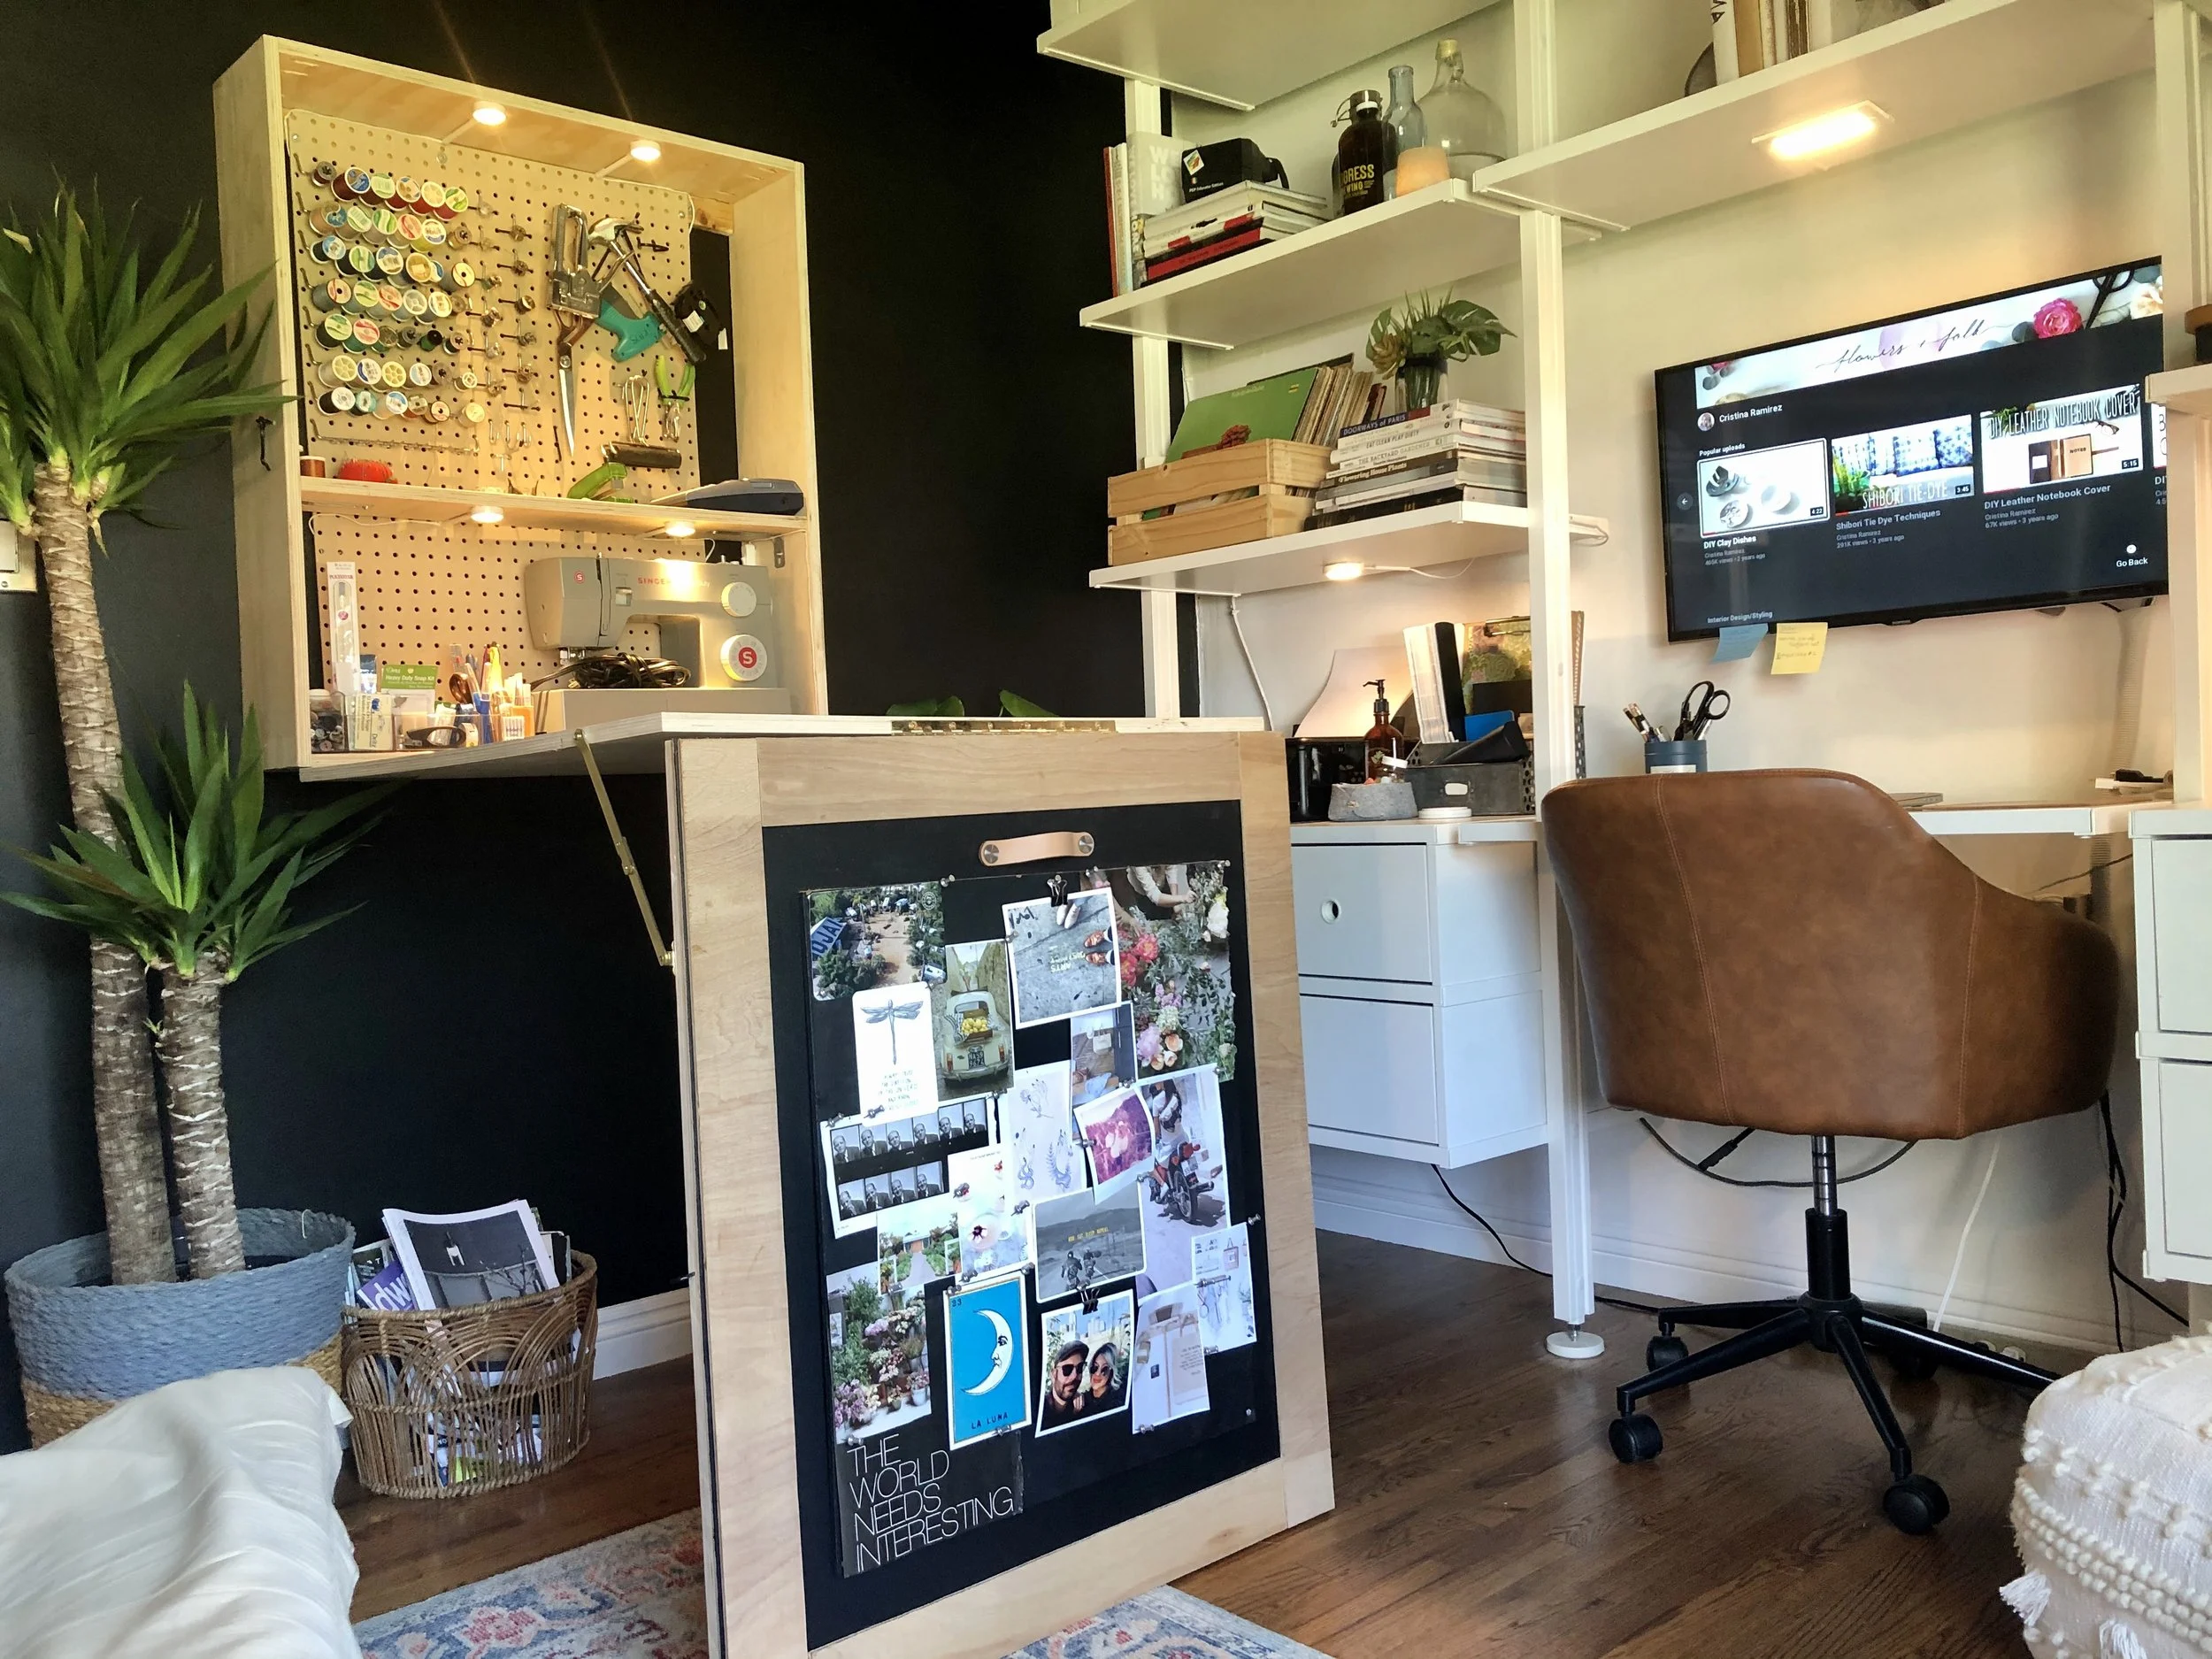
The cabinet is the foundation of this project. It houses the table when it’s folded up, so it needs to be sturdy and well-built. I cut and assembled the frame, making sure everything was square.
3. Creating the Tabletop & Hinges
For the tabletop, I used heavy-duty hinges so it could fold down easily. Quality hardware here is key — you want it strong enough to hold weight but smooth when opening and closing.
4. Adding Support Brackets
The folding brackets lock in place when the table is down, making it stable enough for eating, working, or crafting. Then they collapse back when it’s time to fold the table away.
5. Finishing Touches
Finally, I sanded everything, added trim, and painted it so the table looked like a natural part of the room when folded up.
Lessons Learned While Building
Measure twice, cut once. Precision matters for a smooth fold-down motion.
Don’t skimp on hardware. Heavy-duty brackets and hinges make all the difference.
Personalize it. The beauty of DIY is customizing size, style, and finish to fit your home.
The End Result
Now I have a beautiful table that gives us extra space when we need it — and folds up neatly when we don’t. It’s practical, stylish, and so satisfying to have built it myself!
If you want to see the full build in action, you can watch the video here.

